The following is a step-by-step lesson on how to use ActiveX in Microsoft Visual C#.NET. If you use the free Visual C# 2008 Express Edition instead, check this out.
32 or 64-bit?
Most ActiveXs are 32-bit components, you must select 32-bit code option when using 64-bit compilers. Both 32-bit and 64-bit Windows runs 32-bit applications properly.
In this lesson, we will use Ultimaserial ActiveX to develop a data acquisition application to use DATAQ's Starter kit DI-158 via USB port.
1) Run Microsoft Visual Studio.NET
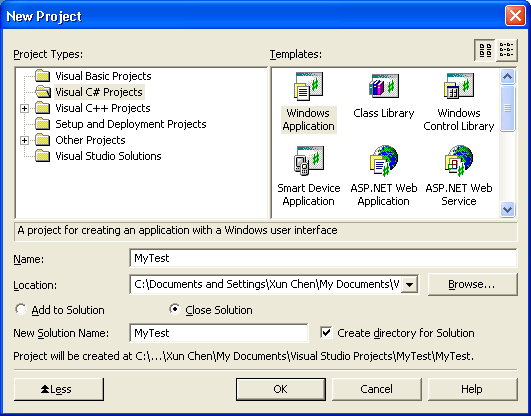
2) Start a New Project. Select Visual C# Projects. Give a name MyTest to the project, hit OK
3) A form is created
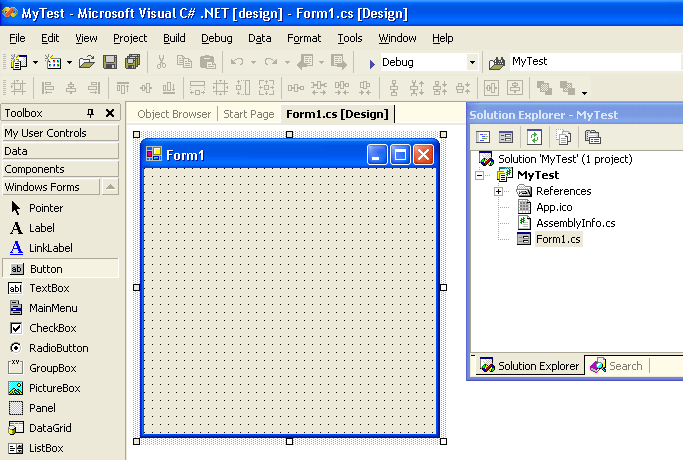
4) Move the cursor to the toolbox (left pane) and click right button
5) From the popup menu, select "Add/Remove Items..."
6) In the dialogue box "Customize Toolbox", select COM components tab
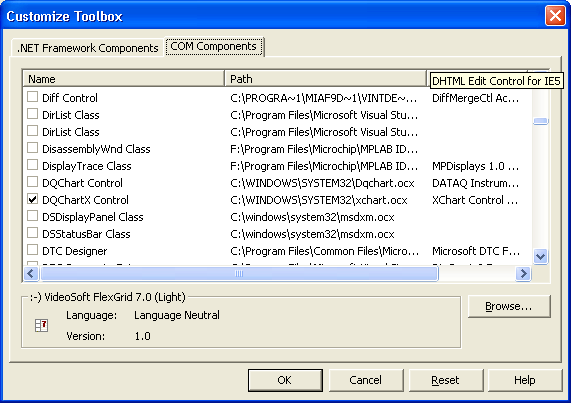
7) Check both Ultimaserial and DQChartX, hit OK
8) Add Ultimaserial and DQChartX components to the form, along with two buttons, named Start and Stop
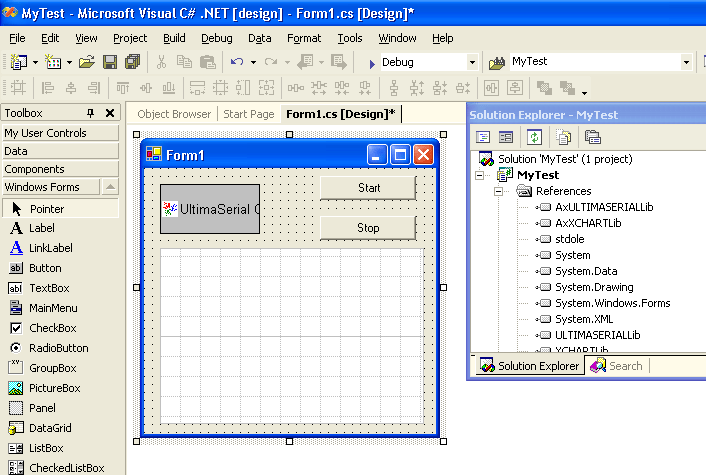
9) Double click on the two buttons to create codes (you will need to switch between the tabs of form1.cs* and form1.cs[Design]* to do so)
10) Back in form1.cs[Design]* tab, select Ultiamserial icon, in its property pane, select Event tab, which looks like a lightning.
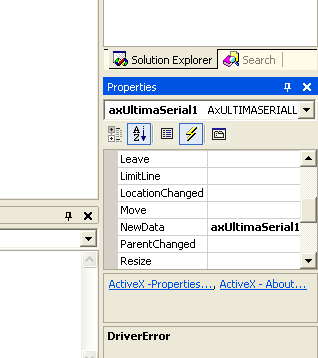
11) Double click on NewData event, now Visual Studio.NET should generate codes should be like this:
private void Start_Click(object sender, System.EventArgs e)
{
}
private void Stop_Click(object sender, System.EventArgs e)
{
}
private void axUltimaSerial1_NewData(object sender, AxULTIMASERIALLib._DUltimaSerialEvents_NewDataEvent e)
{
}
12) Add our codes:
private void Start_Click(object sender, System.EventArgs e)
{
axUltimaSerial1.Device=158;
axUltimaSerial1.CommPort=0;
axUltimaSerial1.SampleRate=20;
axUltimaSerial1.ChannelCount=1;
axUltimaSerial1.AcquisitionMode=0;
axUltimaSerial1.Start();
}
private void Stop_Click(object sender, System.EventArgs e)
{
axUltimaSerial1.Stop();
}
private void axUltimaSerial1_NewData(object sender, AxULTIMASERIALLib._DUltimaSerialEvents_NewDataEvent e)
{
axXChart1.Chart (axUltimaSerial1.GetData());
}
13) To access the data return by GetData? Check this out
Last update: 03/14/22
Copyright: 2000-2005 www.UltimaSerial.com
