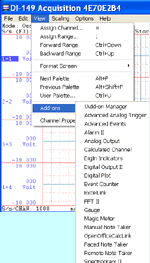
The following is a step-by-step lesson on how to use ActiveX in Excel. If you wish to log data to Excel spreadsheet directly, check this out
32-bit ActiveX doesn't work in the VBA environment of 64-bit version Excel, that's why our WinDaq add-on Excel Link stay outside of Excel and provide data link between WinDaq and any version of Excel.
In this lesson, we will use Ultimaserial ActiveX to develop a data acquisition application with DATAQ's Starter kit.
This sample will acquire data once per second from channel 1 of DI-158 and fill up the first twenty rows of the first column of the spreadsheet continuously.
Note: In this example, instead of embedding all the controls and codes in the spreadsheet directly, I use a form to collect all these so that it acts similar to the other Excel samples.
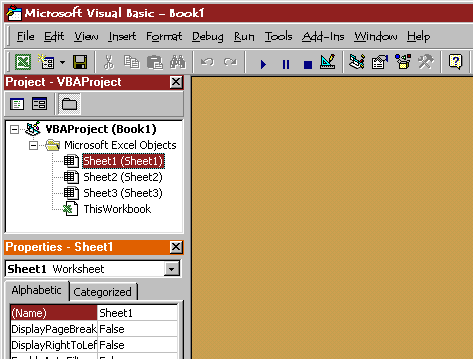
1) Follow Tool->Macro->Visual BASIC Editor, and you should enter Microsoft Visual Basic Editor:
2) In the VB Editor, follow Insert->UserForm, and you should see this:
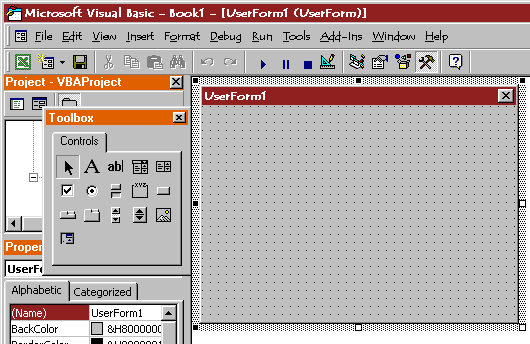
3) Move the mouse cursor to ToolBox. Click the right-button on the mouse and follow Additional Controls ...
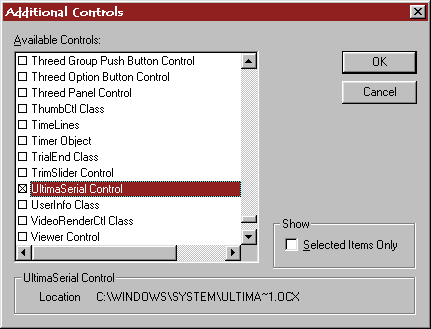
4) In the Additional Controls dialogue box, select UltimaSerial Control and Timer Object , and hit OK to bring the two controls into the ToolBox.
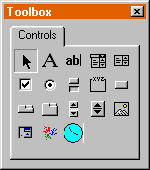
5) Place two command buttons along with UltimaSerial and Timer in the UserForm. Now your screen should be like this:
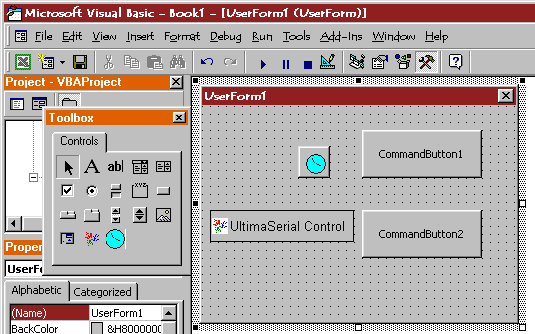
6) Double-click on the CommandButton1, CommandButton2, Ultimaserial, and Timer Objects on the UserForm to create the codes for them.
7) In the Visual Basic code editor, change the default codes (If you decide to type in the codes, you will notice the properties and methods will be displayed in a drop-down menu once you typed in ultimaserial1.)
From:
Private Sub CommandButton1_Click()
End Sub
Private Sub CommandButton2_Click()
End Sub
Private Sub IeTimer1_Timer()
End SubPrivate Sub UltimaSerial1_DriverError(ByVal ErrorCode As Integer)
End Sub
To (Watch for the blue text, we assume button Command1 and 2 for Start and Stop action)
Dim cellindex As Integer
Private Sub CommandButton1_Click()
UltimaSerial1.CommPort = 0
UltimaSerial1.Device = 158
UltimaSerial1.SampleRate = 100
UltimaSerial1.EventLevel = 1
UltimaSerial1.Start
IeTimer1.Interval = 1000
UltimaSerial1.ChannelCount = 1
IeTimer1.Enabled = -1
For cellindex = 1 To 20
ActiveSheet.Cells(cellindex, 1) = ""
ActiveSheet.Cells(cellindex, 2) = ""
Next
cellindex = 1
End Sub
Private Sub CommandButton2_Click()
IeTimer1.Enabled = ValFalse
UltimaSerial1.Stop
End Sub
Private Sub IeTimer1_Timer()
i = UltimaSerial1.AvailableData
'This is here for backward compatibility
'You don't need the above line if you use the latest UltimaSerial (March 4, 2001)
ActiveSheet.Cells(cellindex, 1) = Format$(UltimaSerial1.AnalogInput(Ch1), "0.00")
'This converts the ADReadings to volt, see FAQ page for more info
ActiveSheet.Cells(cellindex, 2) = Time$
'This stamps the time
cellindex = cellindex + 1
'Move to next row
If cellindex > 20 Then cellindex = 1
'We use only the first twenty rows
End Sub
Private Sub UltimaSerial1_DriverError(ByVal ErrorCode As Integer)
i = ErrorCode
End Sub
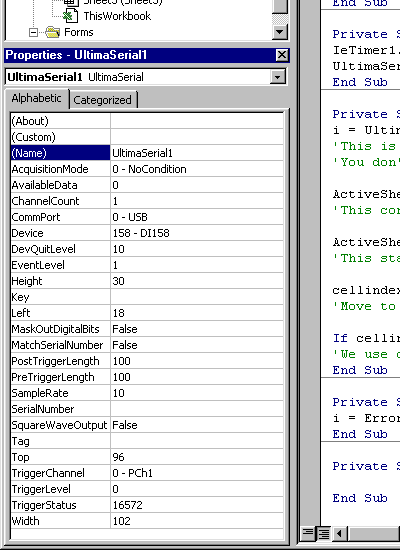
8) Set up ultimaserial control as below, and save your work as Timer.xls
9) Close the Excel Visual Basic Editor, and back to Excel. Make sure you can see the Control ToolBox in your toolbar (the third row in my sample below) If you don't see it, follow View->Toolbars->Control ToolBox to enable it.

10) Add a button from the Control ToolBox to the spreadsheet (Notice the first button on the Control ToolBox toolbar is down. This indicates we are still in Design Mode)
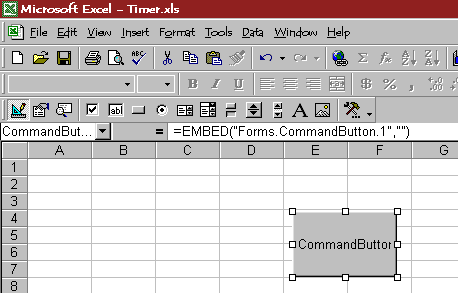
11) Double-click on the button to enter Visual Basic Editor for sheet1. Now change the default code
From:
Private Sub CommandButton1_Click()
End Sub
To: (Watch for the blue text)
Private Sub CommandButton1_Click()
UserForm1.Show
End Sub
12) Back to Excel. Exit Design Mode (The Design Mode button is the first one in the Control ToolBox toolbar, when it is down, it is Design Mode; when it is up, it is Run Mode. See Step 10) for more detail )
![]() Now you can click on the button
on the spreadsheet to bring up UserForm1. Click on the CommandButton1 on UserForm1 and you
will see data begin to fill the first column of the spreadsheet. Click on CommandButton2
to stop the acquisition.
Now you can click on the button
on the spreadsheet to bring up UserForm1. Click on the CommandButton1 on UserForm1 and you
will see data begin to fill the first column of the spreadsheet. Click on CommandButton2
to stop the acquisition.
![]() Please check
this out to find out how to pace the data acquisition rate more accurately.
Please check
this out to find out how to pace the data acquisition rate more accurately.
![]() Here you can learn how to
send data to Excel directly from a VB program.
Here you can learn how to
send data to Excel directly from a VB program.
Last update: 03/14/22
Copyright: 2000-2005 www.UltimaSerial.com
